
Identifying Blackline Masters
In the original edition of the Tools & Toys book, I suggested using a "non-photo blue" pencil for marking blackline masters so that you don't pass it out with the copies you made.
Here's an excerpt of what was written regarding this technique:
What I do is slash a line across the front of my original before I make copies of it. (Even though I can see the line the pencil has made, the xerox machine won't be able to. Thus, the original will show the blue line but the copies won't.) Then, when I get back to class, the blue line will remind me to replace the original in my blackline master folder. Even if I don't separate them right away--which is the case more times than I care to think--the original will still be standing out like a blue light special at K-mart.
Teacher Variation:
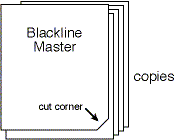
My method of marking originals is to clip off the lower right hand corner. Any pair of scissors will do and, in desperation, I can always tear off the corner!
--Betsy Zafuto, Prospect SchoolTeacher Variation:
I always write "original" on the top of my original paper with a yellow highlighter... it doesn't show up on the copies!
--Jolene Kuebler, Los Angeles Unified School District
Teacher Variation:
I stick a small coloured dot in the top corner of the sheet, a different colour for each Key Learning Area.
Yellow = English
Pink = Math
Blue = Science
Orange = Social Studies
Red = HealthEven though it means that sometimes the photocopied sheets have a dot on them, it makes them easier when tidying my desk at the end of the day. I can put all the yellow dot sheets together, etc. Then, when all the sheets are sorted, I put them straight into the folder file they belong to. Also, my kids are trained that if they get a coloured dot, they know that it's my sheet.
--Rebecca, Stage One, HPPS Australia
![]()
